How I Host This Blog From My Garage
Over the past few years I've been running some servers in my garage as a Kubernetes homelab. I really like homelabbing—having my own hardware lying around is great for tinkering with the latest and greatest "cloud native" technologies, and it just makes me feel kind of warm and fuzzy to host some of my own tools instead of relying on external services. (For instance, I use Gitea to host all of my private git repositories.)
My homelab has gone through a number of iterations and has gotten increasingly complex and "enterprisey" as I've piled on software I want to try but definitely don't need. But I've always been extremely hesitant to publicly expose anything to the internet. It's one thing to run a media server that can be accessed over WireGuard, but it's another thing entirely to open up HTTP ports on a home firewall—a few misconfigurations and your home network could be open to DDoS, hacking, or worse!
A few weeks ago I decided to finally take the plunge and try hosting this blog from my garage. If you're reading this, it either means that it's working or that I've chickened out!
The Cluster
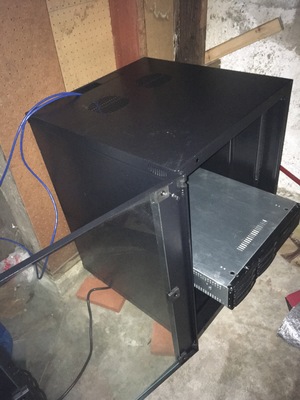
My homelab cluster has three fairly low-powered x86 servers running Flatcar Linux, which is "just enough operating system" to get Kubernetes running on bare metal. All three servers run the Kubernetes control plane with high availability along with all my other "normal" workloads. (If I had a bunch more servers I'd try to separate out the Kubernetes control plane, but it seems to be working fine as is.)
A general tendency with homelabs is to run more "infrastructure-level" software than actual applications, and mine is no exception. Here's an incomplete list of things I'm running to keep everything running:
- Cilium for cluster networking—this gives me a "supercharged" network plugin that does nifty things like encrypt all the traffic between nodes and provide layer 7 firewall rules (more on that later).
- MetalLB for load balancing—this provides Kubernetes
LoadBalancerservices in non-"cloudy" environments (like my garage). - nginx for ingress—every once in a while I think about trying a different ingress controller, but none of the free ones have been compelling enough to lure me away from nginx.
- Rook for clustered storage—this gives me Ceph-backed storage that can be accessed through Kubernetes Persistent Volumes. The volumes stay available even when a server is down, and you can access the data in a few different ways (including S3-style object storage). I've been extremely impressed with Rook and Ceph, and it hasn't been as hard to keep running as I feared it might be.
- Prometheus/Grafana for monitoring and alerting—this is basically table stakes for Kubernetes clusters these days, but it's a pretty great stack.
- Loki for log aggregation—I switched to Loki recently after trying for ages to figure out a decent ElasticSearch setup, and it's just so much better. Loki is pretty easy to get running, and you access your logs through Grafana along with your metrics (I didn't realize what a good idea this is until I tried it).
- Harbor as a private container registry—I've had some trouble with this one but it works well enough.
- Flux for deploying everything with GitOps (I have somewhat mixed feelings about GitOps in general, but Flux is refreshingly simple and does the job).
To stave off the inevitable haters: I know this is over-engineered. That's kind of the point! By trying out "flashy" software in a low-stakes environment, I can have some idea of how it will work in production-critical ones, which helps me make better choices. (As an example, my attempts to run Istio in a homelab setting have convinced me that it should be avoided in most circumstances.)
But I'm getting sidetracked, back to how I host the blog.
Making Some Stuff Public
Until a few weeks ago this all existed in my happy self-contained local network, free from the terrors of the public internet. But I've thought for a while that it's silly to have all this infrastructure sitting around and still pay for cloud hosting. (Well, if I'm being honest, the blog was only costing me a few dollars a month on GCS, but it's the principle dammit!)
If I were a less paranoid person, I would set up my home firewall to forward ports 80 and 443 to my cluster ingress IP address, add some public DNS records, and call it a day. But that would have two problems:
- My home internet connection doesn't have a static IP address, so there'd be dynamic DNS futzing involved (never fun, but not a deal breaker if occasional downtime is OK).
- More importantly: if I didn't do everything exactly right I could have ended up exposing all my private services to the internet, which would be a disaster! (I try to run all my self-hosted apps with proper auth and encryption, but you never know…) And even if I did do everything right, there's always DDoS to worry about.
I considered a few options (including some exotic ones like using a Raspberry Pi
as a kind of DMZ), but the solution I landed on is to use a Cloudflare Tunnel (I
guess formerly known as Argo Tunnel? Cloudflare's branding confuses me
sometimes). Which is kind of like an industrial-grade version of ngrok: you run
a local daemon called cloudflared that connects to Cloudflare's
infrastructure, and then you get a "magic URL" that forwards connections from
the internet through the daemon to your local network.
This approach solves a lot of problems at once: there's no need to open up any inbound firewall ports (hooray!); I don't need to set up dynamic DNS records for my home IP address (which would, among other things, have some bad privacy implications); and I get Cloudflare's DDoS protection and CDN features (which I would have wanted anyways for the blog). And crazily enough, it's all free!
Deploying cloudflared on Kubernetes is pretty straightforward: I just use a
standard Kubernetes Deployment with the cloudflared Docker image and two
replicas for redundancy. The cloudflared pods have a basic configuration that
forwards all traffic to an ingress controller.

Adding a Healthy Sprinkle of Paranoia
Using a Cloudflare Tunnel solved the big issue of exposing my home network to the internet, but it wasn't quite enough to assuage my fears. I took a few steps to lock things down even more.
Deploying a Separate Ingress Controller
I don't want traffic for the blog getting mixed up with traffic for my internal
apps, so I deployed a separate instance of ingress-nginx in a new
namespace. This is pretty easy to manage thanks to Kubernetes ingress classes:
for public apps, I can create Ingress resources with ingressClassName:
nginx-public and everything works out OK.
Nothing earth-shattering here, but worth mentioning since it's a good idea for any Kubernetes cluster that handles both private and public traffic.
Locking Down Pods
Again somewhat boring, but I try to follow all the standard "security best practices" for pods that could get public traffic, like making sure they all have resource requests/limits and adding a security context like:
securityContext:
  capabilities:
    drop:
      - ALL
  readOnlyRootFilesystem: true
  runAsNonRoot: true
  allowPrivilegeEscalation: false
I don't really know much difference these things make (they're basically handed down from on high by The Security People), but I'm not a security expert so who am I to argue.
Locking Down Traffic
What I actually care about from a security perspective is making sure that no traffic from the internet can ever reach anything private on my network. Kubernetes has a tool for solving these sorts of problems: network policies (which basically specify firewall rules for pods). The rules I wanted for my "public" traffic flow were something like:
cloudflaredis allowed to talk to Cloudflare and the nginx ingress controller, but that's it (since it's more or less "untrusted").ingress-nginxis allowed to talk to:- The Kubernetes API (necessary since it's an ingress controller).
- Any pods in the cluster with a special
publiclabel, but no other pods (that way even if I misconfigure anIngress, the public ingress controller won't be able to reach private pods).
Kubernetes network policies are pretty "dumb": they allow you to filter traffic
based on IP addresses and pod/namespace labels. That was a problem for the
cloudflared rules: I really wanted to allow access to DNS addresses (like
api.cloudflare.com) instead of IP addresses (in network-speak: I wanted a
layer 7 policy instead of layer 4).
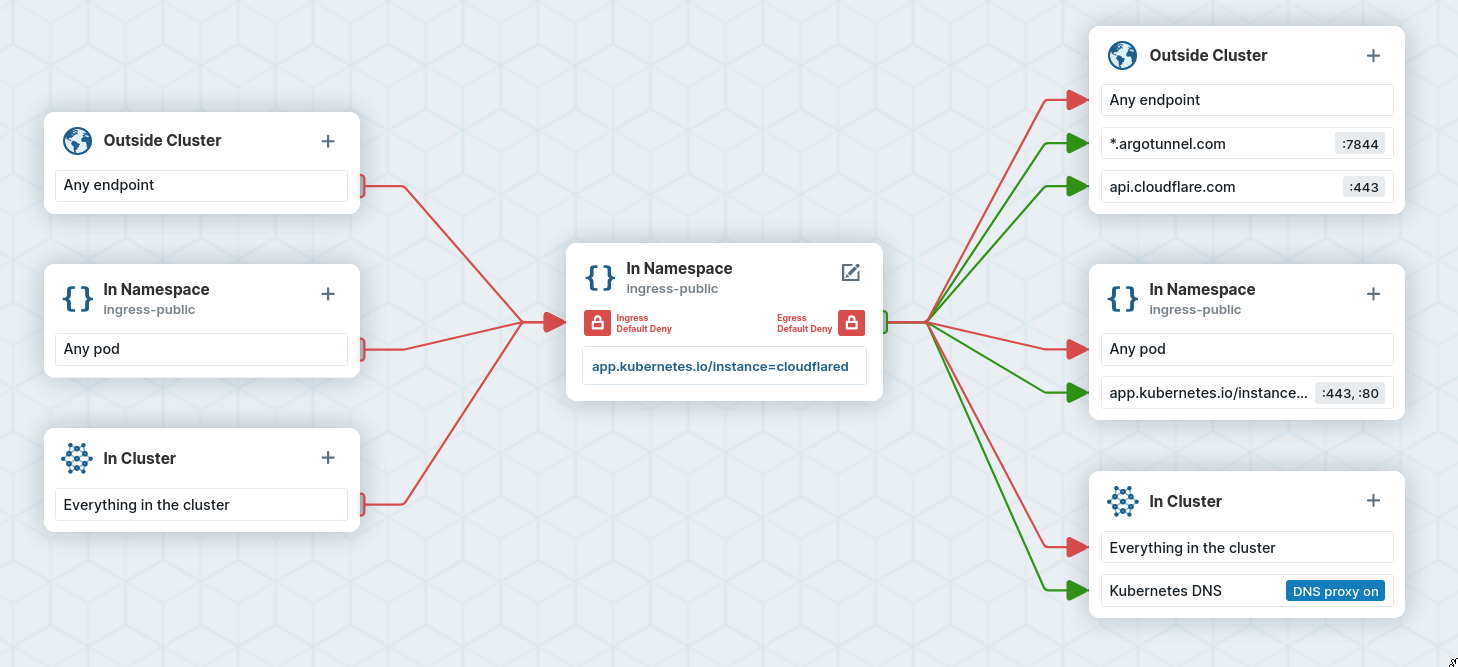
Cilium actually makes that possible through CliumNetworkPolicys, which are
supercharged network policies that allow layer 7 filtering. Here's what the
cloudflared policy ended up looking like (slightly shortened):
apiVersion: cilium.io/v2
kind: CiliumNetworkPolicy
metadata:
  name: cloudflared-egress
  namespace: ingress-public
spec:
  endpointSelector:
    matchLabels:
      app.kubernetes.io/instance: cloudflared
  egress:
    # ...
    # Allow tunnel connections to Cloudflare
    - toFQDNs:
        - matchPattern: "*.argotunnel.com"
      toPorts:
        - ports:
            - port: "7844"
    # Allow traffic to the Cloudflare API
    - toFQDNs:
        - matchName: api.cloudflare.com
      toPorts:
        - ports:
            - port: "443"
    # Allow traffic to the ingress controller
    - toEndpoints:
        - matchLabels:
            app.kubernetes.io/instance: ingress-public
      toPorts:
        - ports:
            - port: "443"
        - ports:
            - port: "80"
(There are similar policies for the ingress controller pods, but I don't want to inundate you with YAML so I'll leave them out.) The policy files are a bit verbose, but Cilium has a cool GUI policy editor that makes them easier to generate.
The upshot is that even if a cloudflared pod were to be compromised somehow,
it would have very few opportunities to wreak havoc in my local network (at
least that's what I'm hoping 🤞).
The Actual Content
What about the actual website content? Here I ended up with a pretty boring solution:
- Static HTML/CSS/etc. is generated with Hugo (which I was already using).
- I build an extremely simple Docker image based on an nginx image with all the static content copied in (along with a basic nginx configuration file).
- I deploy the blog image with a standard Kubernetes
Deployment.
So I use oodles of the latest and greatest in Cloud Native technologies configured with thousands of lines of YAML to ultimately serve static HTML in a way not too different from how any self-respecting webmaster would have done it in the 90s. Hooray for technological progress.
At least performance seems pretty decent (round trip requests are about 50ms uncached for me).
Maybe Try This At Home
Well, hosting a blog from home is probably not a great idea from a practical perspective. (I'll see how this experiment works out…) But self hosting and homelabbing in general can be a rewarding way to hone your DevOps/sysadmin skills and maybe even get more control of your data, if you're into that sort of thing.
If you haven't given homelabbing a try and you're curious, here are some resources that I've found helpful:
- The homelab and SelfHosted subreddits
- The Self Hosted podcast
- Jeff Geerling's YouTube channel (especially for Raspberry Pi craziness—if I were starting over from scratch I'd probably go with Raspberry Pis to keep power usage down)
If you like this stuff, let me know and I might do some more posts on homelab adventures.